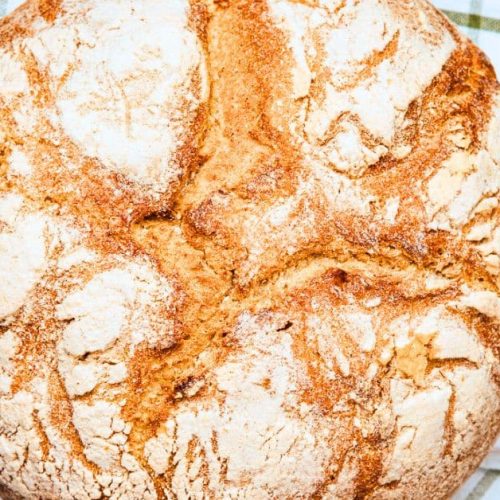
Homemade Sourdough Bread Recipe
Made with just flour, water, salt, and a natural sourdough starter, this slow-fermented baked hearty bread is crusty on the outside and chewy on the inside and is great for sandwiches or soup and salad sides!
Equipment
- Large bowl
- Plastic wrap, lid, or clean dish towel
Ingredients
FOR THE LEVAIN
- 1 Tablespoon active sourdough starter - see our recipe
- 1/3 cup flour all-purpose or bread flour
- 1/3 cup water
FOR THE DOUGH
- 2 1/2 cups water divided
- 1 Tablespoon salt
- 5 1/2 cups flour all-purpose or bread flour
Instructions
MAKING THE LEVAIN
- In a large mixing bowl, combine 1 Tablespoon active sourdough starter, 1/2 cup flour, and 1/3 cup water.
- Mix completely to form a thick batter.
- Cover with plastic wrap or lid and let in sit for at least 12 hours (or overnight).
- After sitting, the levain is ready if it's bubbly on top and it floats in water. To test, place a spoonful of the levain in a glass of room temperature water. If it floats, it's ready to use. If not, cover it and let it sit longer and retest.
USING THE LEVAIN
- In a small mixing bowl, combine 1/4 cup water and 1 Tablespoon of salt. Stir. Set aside, stirring occasionally to dissolve the salt. Set aside to be used after the Autolyse Stage.
- To the levain in a large mixing bowl, add 2 cups of water. Use your hands to break up the levain in the water to help it dissolve. (Some clumps will remain.)
- Add in 5 1/2 cups all-purpose flour (or bread flour). Stir with a rubber spatula, making sure that no dry flour is left and a dough is formed.
Autolyse Stage
- Cover the bowl with plastic wrap (or a clean dish towel) and let the dough rest for at least 30 minutes (but no longer than 4 hours). This is called the autolyse stage.
- After the rest period (the autolyse stage), pour the dissolved salt water over the dough in the bowl. Pinch and squeeze the dough to distribute the salt water. At this point your dough will be loose and wet
FOLDING THE DOUGH (TOTAL TIME: 2 ½ HOURS)
- Starting on one side of the dough in the bowl, grab the edge, lift up the edge, and then fold over the dough onto itself. Turn the bowl and repeat with the next edge, doing this a total of 4 times. *You are folding the dough and not kneading (like you would in regular bread making)!
- Leave dough in bowl and allow to rest for 30 minutes.
- Repeat the process of folding the dough over again and then letting it rest for 30 minutes.
- Repeat this process a total of 6 times, which is every 30 minutes for 2 1/2 hours. The dough will become tighter and smoother throughout the process.
- After the final folding, cover the bowl with plastic wrap or a clean dish towel and let it rest, undisturbed, for 30-60 minutes. It should puff up slightly and look a little larger than when you started. but it will NOT double in size.
DIVIDING AND SHAPING THE DOUGH
- Prepare a work surface by sprinkling a light layer of flour on it.
- Gently take the dough out of the bowl and place it on the floured work surface, being careful not to deflate the dough.
- Using a pastry scraper or large knife, divide the dough in half.
- Lightly flour your hands or a pastry scraper and gently form each dough half into a round.
- Allow the dough to rest for 30 minutes.
- While the dough is resting, line two mixing bowls with clean dish towels. Dust the towels heavily with flour, using your fingers to rub the flour into the bottoms and sides. Use enough flour to form a thin layer on each dish towel. It may seem like too much, but it's not! These are your "proofing baskets."
- Work with one dough ball at a time: Dust the dough ball with flour. Using a pastry scraper, gently flip the dough over so now the floured side is down and the sticky side is up.
- Shape the dough like you did earlier by folding:Starting with one side, grab the bottom of the dough and gently pull it up and over to the center. Repeat with each side. Use your hands around the bottom edges to shape the dough into a round so it's tight. Repeat with second ball of dough.
- Generously dust the tops and sides of the shaped dough with flour. Place them in the proofing baskets with the seams from shaping on the bottom (upside down).
- Cover the proofing baskets loosely with plastic wrap. Let them rise for 3-4 hours at room temperature, until they poof up. You can also allow them to rise overnight by placing them in the refrigerator for 12-15 hours.
BAKING THE BREAD
- Heat oven to 500°F.
- Place two Dutch ovens or heavy pots with lids into the oven to heat.
- Carefully remove one of the Dutch ovens/pots from the oven and remove the lid. Carefully place one dough round into the pot (seam side down). Repeat with second loaf in second pot. *If you only have one Dutch oven or heavy pot, just bake one bread round and then the second round after
- Using a serrated knife, score the top of the bread dough.
- Cover with lid and place in oven. Bake for 20 minutes.
- After 20 minutes, reduce the oven temperature to 450°F and bake the bread for 10 more minutes. **DO NOT LIFT THE LID TO CHECK THE BREAD. ALLOW IT TO CONTINUE BAKING.
- After the 10 minutes, remove the lid(s) and continue baking another 15-25 minutes. After this, the loaves will be springy and dry and start to have a golden color. Continue baking until the loaves are a deep, dark golden brown (probably darker than you feel comfortable with if you're used to baking regular bread).
- Remove pots from oven and carefully (using tongs or a spatula) lift the loaves out of the pots and place them on wire cooling racks.
- Cool to room temperature before slicing with a bread knife.
- Store sourdough bread at room temperature in a paper bag for 3 days or wrap tightly in plastic wrap and freeze for up to 2 months.
*Nutrition information is approximate. If you have special dietary needs, please calculate your own nutrition.
Tried this recipe? Leave a review!Let us know how it was!